RSS Feed

‘Desserts and Sweets’ Category

  1. Hot Milk Cake with Brown Sugar Frosting

    February 16, 2026 by Lisa

    My grandmother had a fairly limited repertoire of dishes, or perhaps I have a limited memory of what she cooked. Nevertheless, this is only dessert I can recall her making, so it carries a lot of weight in the memory department. She never wrote down recipes, so this is a recipe that comes from internet searches and trial and error. This one will need some tweaks before it’s perfect, but so far it’s tickling those little grey cells.

    Now then, no ads to wade through, but I am going to add a little story-time, because, well, it’s my website.

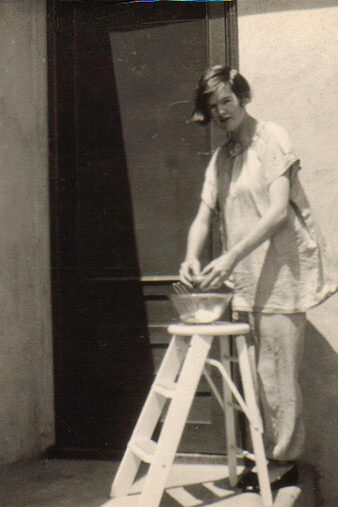
    In the 1930s, my grandparents lived in what was essentially a government-built work camp in the middle of the Mojave desert. When the then-named Boulder Dam was being built, Boulder City was a tightly-regulated, purpose-built, and interestingly, dry town. My grandfather was an electrician and my grandmother a nurse, so despite the hard times of depression-era life, they likely had a fairly stable existence. Hot Milk Cake was pretty popular then because it was quite unforgiving – no fancy ingredients, no frothy egg whites or whipped cream – just basic ingredients in proportions that would be easy to reproduce.

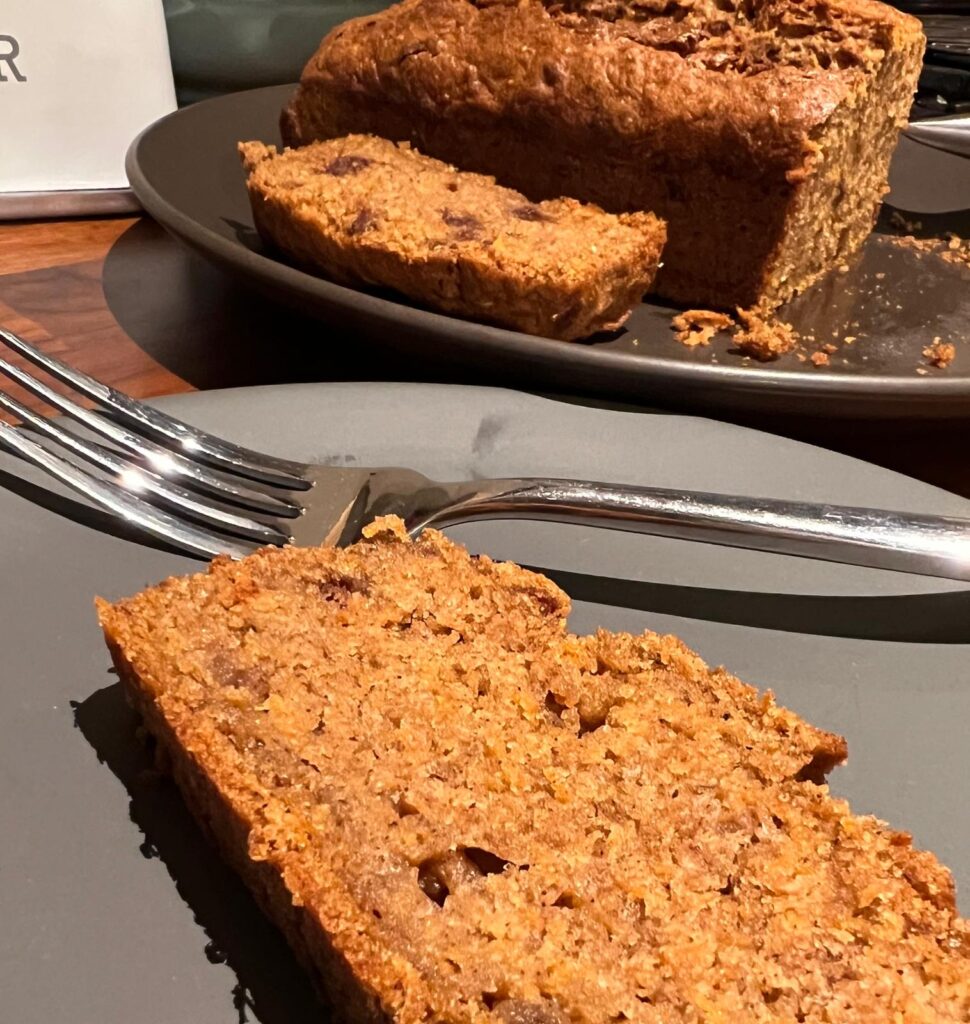
    Ours was always topped with a brown sugar icing. Again, nothing fancy and certainly nothing that would melt in the intense heat. So, here’s mine. It feels close to what I remember if a little more dependent on the right oven temperature than I’d hoped. I guess grandmas get to know the quirks of their ovens and compensate.

    Ingredients:

    Cake:

    • 120g plain flour
    • 1 tsp baking powder
    • ¼ tsp salt
    • 200g caster sugar
    • 2 eggs (room temperature)
    • 120ml milk
    • 60g butter
    • 1 tsp vanilla extract


    Icing:

    • 120g light brown sugar
    • 60g butter
    • 60ml milk
    • Pinch of salt
    • ½ tsp vanilla


    Instructions:

    Heat the oven to 170 °C (suggest not using fan for this one), grease and flour (or line) a 20cm/8″ square metal cake tin.

    Whisk the flour, baking powder and salt in a small bowl. In a larger bowl, beat the eggs and sugar together until thick and pale.

    In a small saucepan, heat the butter and milk until it just starts to bubble around the edges. Remove from heat and add the vanilla.

    Add the flour to the egg mixture in two goes and fold them gently together. Now pour the hot milk and butter mixture down the side of the bowl while folding it in. Pour the mixture into the prepared baking tin and put it in the oven – dead centre (this is surprisingly important). Bake for 25-30 minutes until a toothpick comes out clean.

    For the icing, melt the sugar, butter and milk in a small saucepan and bring it to the boil for 2-3 minutes. Remove from heat and add vanilla and salt. Let it cool and thicken for about 5-10 minutes then beat well until it thickens and turn opaque. Make sure it’s not too hot when you pour it over the cake.

    Done. Transport yourself back to 1932. Or in my case, 1972.


  2. Maple Date Slice

    February 2, 2026 by Lisa

    This is an extra-rich version, slightly lower in processed sugars. Using dark brown sugar gives it a hint of treacle!

    Maple Date Slice

    Ingredients:

    Date Filling

    • 340g pitted dates finely chopped
    • 188ml water
    • 80ml maple syrup


    Base and Topping

    • 125 g plain flour
    • 80 g rolled oats
    • ¼ teaspoon baking soda
    • ¼ teaspoon salt
    • 85 g butter at room temperature
    • 60ml maple syrup
    • 100g dark brown sugar


    Instructions:

    Combine chopped dates, water and maple syrup in a small saucepan. Bring to a boil and cook for 10 minutes until most of the liquid is absorbed. Stir frequently.

    Preheat oven to 180 degrees C (160 Fan). Line a 18cm x 30cm pan with grease-proof paper.

    Stir together flour, oats, baking soda and salt in a small bowl.

    Beat the butter, maple syrup and sugar about 3 minutes until fluffy. Add dry ingredients and mix together lightly – the mixture will be crumbly.

    Add about 2/3 of the base and topping mix into the prepared baking dish and press down lightly. Spread the date mixture evenly over top, then cover with the remaining mixture.

    Bake for 30 minutes, or until the mixture starts to pull from the edge of the pan and is spongey when pressed in the centre. Cool completely and slice!


  3. Healthy Cornbread – Jiffy dupe!

    July 28, 2025 by Lisa

    These are honestly so good – like Jiffy Cornbread but without the hydrogenated yuck.

    Makes 10-12 muffins. Per muffin: 142 kcal, 3.52g protein, 19.84g carbohydrates, 5.22g sugars, 5.85g fats, 1.75g fibre, 55.67mg sodium

    Bake: 17–18 minutes at 180°C fan (200°C conventional)

    • 120g (1 cup) fine or medium cornmeal
    • 120g (1 cup) M&S plain whole wheat flour
    • 1 tbsp baking powder
    • ½ tsp baking soda
    • ½ tsp salt
    • 1 large egg
    • 180ml (¾ cup) semi-skimmed milk
    • 1 tbsp lemon juice (to sour the milk)
    • 75g (scant ⅓ cup) maple syrup
    • 60ml (¼ cup) sunflower oil
    • 3 tbsp Greek yoghurt (for moisture)

    Instructions:
    Preheat oven to 180°C fan (200°C conventional). Line or lightly grease a muffin tin.

    In a small bowl, combine milk and lemon juice. Let sit for 5–10 minutes to curdle (or use buttermilk).

    In a large bowl, whisk all dry ingredients.

    In another bowl, whisk egg, maple syrup, sunflower oil, and yoghurt. Stir in the soured milk.

    Gently combine wet and dry ingredients.

    Divide evenly into muffin cups (about ¾ full).

    Bake 17–18 minutes, until golden and a toothpick inserted comes out clean.

    Cool in the tin for 5 minutes, then transfer to a rack.


  4. Very Healthy Carrot Cake

    April 25, 2025 by Lisa

    Carrot Cake Photo
    I could have cooked it another 5-10 minutes…

    Normally I dislike long preambles to recipes, but this one deserves a little story-time.

    I am not a confectioner. Cakes are not my thing and I have always left them to my ridiculously talented daughter. I think the only cakes I’ve ever made have come out of a box. As I’ve got older, however, and have taken a keener interest in my health — and especially the foods I eat — I’ve started to look for healthier versions of everything. I’m now very used to unsalted foods and have completely cut out processed foods, most simple carbs and sugar. Nevertheless, food is so very important and a life without dessert is a life without a particularly joyful part of it.

    For a family Easter dinner, I decided to try making a carrot cake and, oh my lord, did it fail. Being a not-confectioner, I failed the first rule of cake-making: do not overmix. I mixed everything with an electric mixer and the cake was dense and heavy and frankly, slightly disgusting. The family called it “edible” and “really tasty” but I was horrified. Not to be beaten by a damned carrot cake, I decided to try again and against my better judgement, decided to create my own recipe.

    So, here’s my very own concoction. It’s not perfect, but it was way more than edible and actually tasty. I will update as I improve. Also, pretty damned healthy by dessert standards!

    Serves 10: 253 kcal, 13.6g Total Fat, 30.9 Total Carbohydrates, 3.7g Protein per serving

    Ingredients:

    • 125ml sunflower oil
    • 2 eggs
    • 125ml maple syrup
    • 100g whole wheat flour
    • 100g plain flour
    • 1.5 tsp baking powder (don’t use out of date powder like I did the first time!)
    • 2 tsp cinnamon
    • 1 tsp allspice
    • 200g grated carrot
    • 10 dates, chopped into small pieces (optional, or use raisins)

    Instructions:

    Preheat oven to 175C/350F. Line a loaf pan with parchment and a bit of oil. I used a 11cm x 6cm x 20cm tin but a smaller deeper one might be better next time for a taller cake (with adaptations to the cooking time).

    In a large bowl, mix together the oil, maple syrup and eggs until combined.

    In a separate bowl, whisk together the flours, baking powder and spices.

    Add the dry ingredients to the wet and gently mix. I can’t emphasize gently enough here – this was my undoing. Then fold in the carrots and dates. Pour the batter into the lined loaf pan and bake for 45min to an hour. Every oven is different, so check frequently after about 40 minutes by inserting a long toothpick until it comes out clean.

    Remove and cool in the tin on a wire rack for about 30 minutes. Remove to the rack until completely cooled before frosting as desired (healthy frosting recipe in the works!).


  5. Christmas cheesecake (GF)

    December 8, 2024 by Lisa

    This cheesecake is so easy, no-bake, gluten free, relatively low sugar and beautifully Christmassy. Double it for a bigger cheesecake but this mini one easily serves 8.

    Ingredients:

    For the crust:

    • 150g gluten free ginger biscuits, crushed
    • 70g melted butter


    For the filling:

    • 250g cream cheese
    • 150ml double cream
    • 125g mascarpone
    • 40ml maple syrup
    • 1 tbsp vanilla extract

    Instructions:

    Line an 8” springform or loose base pan with baking parchment. Mix the melted butter with the crushed biscuits and press into the bottom of the pan, pushing a little up the sides to form a little lip. Refrigerate while mixing the filling.

    Combine the cream cheese, mascarpone, maple syrup and vanilla in a bowl. Add the cream and mix until stiff peaks form. Add a little more maple syrup to taste if you like. You could also add some lemon juice for a lemon cheesecake but I love the subtle creaminess of the mix unadulterated.

    Add the mix into the pan and smooth it down, pressing into the pan. Refrigerate several hours or better overnight. Top with fresh cranberry sauce or any other festive fruit you fancy.


  6. Soft Flapjacks

    January 14, 2024 by Lisa

    These are a thick, buttery, soft and crumbly flapjack. And when I say buttery, I mean there is a LOT of butter in this recipe.

    Ingredients:

    • 150g granulated sugar
    • 225g salted butter, melted
    • 115g golden syrup
    • 270g porridge or rolled oats
    • 185g plain flour
    • 1/4 tsp salt
    • Jam, peanut butter, biscoff spread or fruit, as you like. Or nothing at all, if you also like.

    Instructions:

    Mix the sugar, melted butter and golden syrup in a bowl. Separately, mix the dry ingredients in a large bowl and then add the sugar and butter mixture and combine well. Add half the mix to a 16cm x 25cm rectangular baking dish lined with parchment paper and press down firmly. Add some generous dollops of whatever filling takes your fancy and then top with the rest of the flapjack mixture and press down.

    Cook in a 160C conventional/150C fan oven for 40 minutes. If you cook it longer, they do get considerably harder (I know because I didn’t hear my timer the second time I made these – oops). Cool for 5-10 minutes in the dish then use the baking parchment to lift onto a wire rack until cool before cutting into any size you like.

    I think you could use all manner of things in the middle of these. A chocolate spread would be delicious, as would some sort of salted caramel, both of which I will try next time I make them.

    Makes around 16 servings, more or less.


  7. Gingerbread Cookies

    December 24, 2023 by Lisa

    These are soft, thick gingerbread cookies that are super simple to make.

    Ingredients:

    • 225g salted butter, at room temperature
    • 213g light brown sugar
    • 170g black treacle
    • 390g plain flour
    • 2 1/2 tsp ground ginger
    • 1 1/2 tsp cinnamon
    • pinch of nutmeg
    • 1/2 tsp baking soda
    • 1/2 tsp salt

    Instructions:

    Beat butter and brown sugar in a large mixing bowl until creamed. Add the treacle and mix until combined. Add flour and spices and mix well. Add 1-2 tsp of milk if the dough doesn’t stick together well.

    Divide the dough into halves, and roll each one between sheets of parchment to 1.25cm. Place the rolled dough in parchment paper on a baking sheet and chill for 1-2 hours in the refrigerator.

    Preheat your oven to 170° C fan or 180° C normal. Cut your desired shapes out of the chilled dough and place a couple of inches apart on a baking sheet. If the cookies are no longer firm and cold to the touch put the sheet back in the refrigerator or freezer for 5 to 15 minutes.

    Bake for 8-9 minutes. They should look just set and slightly puffy. Let cool on the baking sheet for 10 minutes before transferring to a wire rack. Cool completely before decorating.

    The dough can be made, rolled out, and stored in the refrigerator for 1-2 days before baking or baked, cooled, and stored in an airtight container for 1-2 days before decorating.


  8. Fruit Crumble

    December 18, 2023 by Lisa

    Crumbles are super easy, but I always have to look up the proportions. This recipe is about right for a decent layer of fruit and a thick crumble. Honestly, I could eat crumble without the fruit, but we all need our 5 a day, right? Switch up the fruit as you like: apple, pears, maybe add some blackberries. You can use rhubarb if you’re feeling spicy – just pre-cook in a covered saucepan until soft and add sugar to taste. Use a rectangular baking dish. An 18×25 will serve 6-8.

    The Fruit:

    • 2 large Bramley apples for an apple crumble, but use more or less as you like
    • 2-3tsp cornflour
    • 150g caster sugar (or less if the fruit is sweet, like pears or eating apples)
    • 1tsp cinnamon

    The Crumble:

    • 240g plain flour
    • 150g room temperature salted butter, cut into pieces
    • 120g demerara sugar
    • 1-2tsp cinnamon
    • 100g rolled oats

    Peel and slice the apples into 1-2cm slices. If you use pears, cut into chunks as the pears will cook quickly. toss in a bowl with the cornflour, sugar and cinnamon.

    In a separate bowl, combine the flour, sugar and cinnamon with the butter and rub together with your fingers until the butter is evenly distributed and it has the texture of wet sand. mix in the oats.

    I always add a thin layer of crumble to the bottom of the dish as I love the slightly gooey base, but you can go straight in with the fruit if you prefer. Add the rest of the crumble to the top in an even layer. You can give some of the crumble a bit of a squeeze to create some larger crumbs which will crisp up nicely. If you want a really crunchy top, sprinkle on some more demerara sugar, but watch carefully so it doesn’t burn.

    Cook for 30-40 minutes at 180C fan or 200C conventional. You can stab a fork in to make sure the fruit is cooked. Serve hot or cold with cream, custard or ice cream.


  9. Possets

    May 13, 2023 by Lisa

    IMG_8988
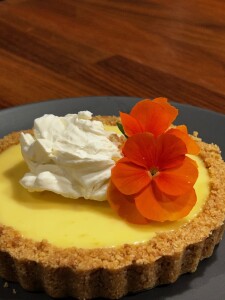
It’s been a minute, but I wanted to save this recipe because I LOVE it so much. You can also add this to a tart base or fill your desert pots with a biscuit crumb base. You can use lemon, orange or any citrus juice. Lemon is my favourite but I may try a grapefruit posset next time.

    Ingredients:

    • 300ml double cream
    • 100g caster sugar
    • 38ml citrus juice
    • zest of one citrus

    Put the cream and sugar in a saucepan and heat gently, stirring until the sugar is melted. Bring to a simmer and cook for 1 minute. Turn off the heat and add the juice and zest. Pour into tart base or divide between small pots. Cool to room temp and then chill in the refrigerator until set.

    It’s really that easy!


  10. Salted Clotted Cream Fudge

    December 27, 2017 by Lisa

    I haven’t posted in a very, very long time. I guess I’ve not really tried anything new! But that changed over Christmas as I had some time to make homemade things for hampers and found out how easy it is to make both clotted cream and fudge. Yes, you can make your own clotted cream and it’s really easy.

    This fudge recipe is based on a combination of quite a few recipes online and although I made only the one small batch, I’m pretty sure I have the foundations right. You can pretty much use any amount of clotted cream and sugar if you have a suitable sized pan. But let’s start with the clotted cream as you’ll need to start a day ahead. You’ll also want a jam thermometer as trying to determine the “soft ball” stage is more work than I was willing to put in. Mine was a good investment – essential for chili jam!

    IMG_2527Clotted Cream

    Pour enough double or whipping cream (heavy cream in the states) into a flat bottomed pan to give about 1-2 inches of cream.

    Place into a 80 C (180F) oven and leave it for 12 hours. After 12 hours it should have a golden yellow top. Take it out and cool to room temperature, then cover and place in the fridge for another 8-10 hours.  After that you should be able to gently scoop out the cream into a covered jar and keep it for up to 5 days. Easy! Oh, and so much cheaper than store-bought.

    Clotted Cream Fudge

    The amount you make will depend mostly on the quantity of cream you’ve made. This recipe assumes you have at least 225g of cream from your clotted cream making adventures. The syrup is really important, as it is, apparently what prevents sugar crystals from forming and gives this fudge the smoothest texture you can imagine. In general, however, just use the same amount of sugar as cream and make a guess as to the other ingredients. A little more or less vanilla or syrup isn’t going to make a huge difference.

    Start by lining a pan with grease-proof paper. You could butter it a bit as well, but make sure it covers the bottom and sides of the pan. I used a loaf pan for this amount of fudge.

    Ingredients:

    • 225g clotted cream
    • 225g caster (fine) sugar
    • 100ml golden syrup (or corn syrup)
    • 1 tablespoon vanilla paste or essence
    • pinch of flaked Maldon salt plus additional for the top


    Method:

    Place all the ingredients in a heavy bottomed pan and place over a low heat until the ingredients melt together. Try not to stir, but a little stirring didn’t hurt. This could take a rather long time – maybe half an hour or more. Have a cup of coffee.

    Once melted, put the thermometer in the pan and raise the heat to boiling, stirring constantly until the thermometer reaches “soft ball” or 118C (235F) and remove from the heat. Beat until the mixture thickens – about 10 minutes. It’s supposed to turn from glossy to matt textured, but mine really didn’t seem all that matt! Pour into the lined pan and press flat. Sprinkle with the Maldon salt flakes.

    Refrigerate until set, then remove and cut into whatever shape takes your fancy.